Hosting a Static Website on Amazon S3: A Step-by-Step Guide


Table of contents
Introduction
In this walkthrough, you will learn the process of hosting a static website on Amazon S3. This project serves as an excellent starting point for understanding the fundamentals of hosting a website on the cloud.
Before going further, it'll be necessary to understand what Amazon's S3 is and how it functions.
What is Amazon S3?
Amazon Simple Storage Service (S3) is one of the most widely used AWS services. It's a storage solution that allows you to store and retrieve any amount of data at any time, from anywhere on the web.
S3 is extremely scalable and guarantees 99.999999999% (11 9's) of durability, meaning you can trust that your data is safe. It's like a bank for your bytes – from a few KBs of personal photos to petabytes of big data used by Fortune 500 companies.
Some key features of S3 include:
Object storage built to store and retrieve any amount of data
Automatic encryption of data
Lifecycle management capabilities
💡 Example: Think of S3 as a massive data shopping center. You can rent as much space as you need without worrying about running out of space or losing your data.
Now that we understand the concept behind Amazon S3, let's learn how to host a static website on the cloud.
Project Background
For this project, the primary objective is to create a simple static website using Amazon S3, making it accessible to the public.
Project Implementation
1. Planning Phase
Sign up for an AWS account to access the AWS Management Console, the central platform for managing AWS services.
2. Execution Phase
Step 2: Create an S3 Bucket
Go to S3 Dashboard: In the AWS Management Console, find the S3 service, and open the S3 dashboard.
Create a Bucket: Click on the "Create Bucket" button.
Name Your Bucket: Give your bucket a unique name (this will be part of your website's URL). For example, "my-awesome-website", in case you get an error stating "bucket with same name already exists", choose another unique name for your bucket.
Select Region: Choose the AWS region for your bucket.
Configure Bucket Properties: By default, keep most settings as they are. You can configure permissions and manage options like logging and versioning if needed.


After clicking the "Create Bucket" button, you will receive a notification confirming that the bucket has been successfully created.

Step 3: Upload Website Files
Prepare Your Website Files: Create your HTML, CSS, JavaScript, and other necessary files for your website. Ensure that your main HTML file is named
index.htmlUpload Files to the S3 Bucket: In the S3 dashboard, open your newly created bucket and click the "Upload" button. Upload all your website files here.

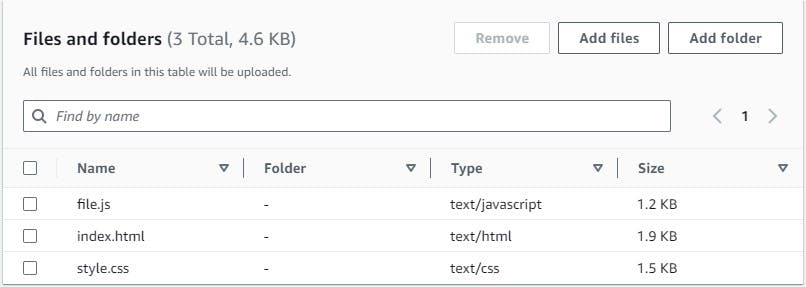
After uploading your website files, click the "upload" button below. You will then receive a notification confirming your upload status.

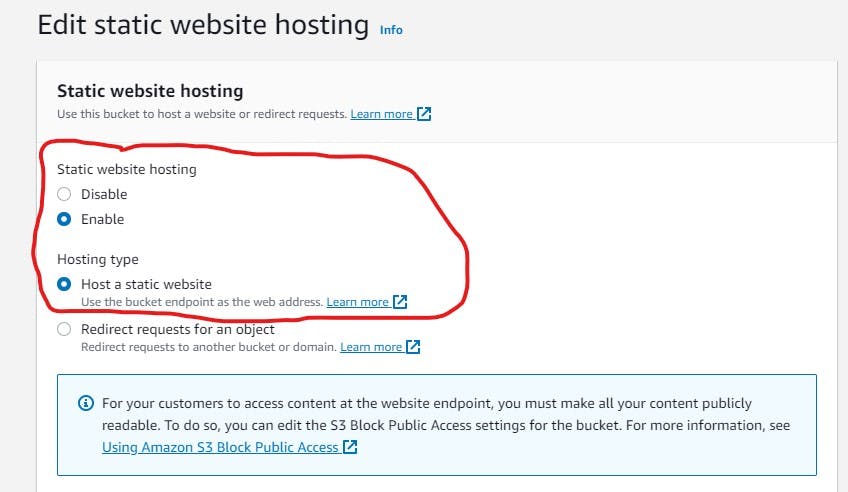
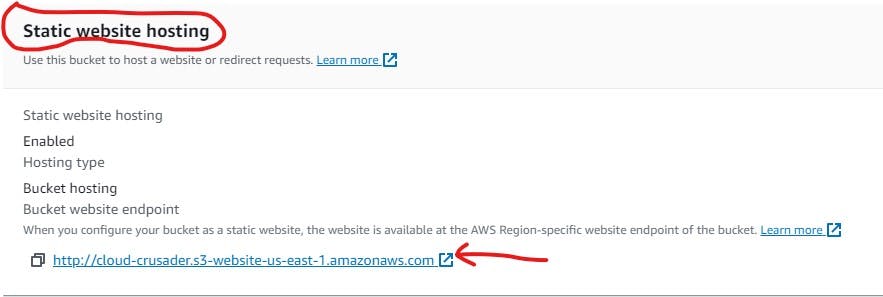
Step 4: Enable Static Website Hosting
Select the Bucket: Go to the bucket properties.
Static Website Hosting: Click "Edit" on "Static website hosting" and enable it.
Set Index Document: Enter the name of your main HTML file (usually
index.html).Set Error Document (Optional): Define an error page if needed.
Save Changes.


Step 5: Set Permissions
Permissions Settings: In the bucket properties, go to the "Permissions" tab.
Edit Bucket Policy: Add a bucket policy to allow public access to your website. The policy should allow
s3:GetObjecton*for the "Principal".- Here's an example of a simple policy:
{
  "Version":"2012-10-17",
  "Statement":[{
    "Sid":"PublicReadGetObject",
    "Effect":"Allow",
    "Principal": "*",
    "Action":["s3:GetObject"],
    "Resource":["arn:aws:s3:::(input name of bucket)/*"]
  }]
}


3. Save the Policy.

4. Input the JSON code from above.
After saving the policy, click "Edit" under "Bucket Policy".

After clicking on "Edit", copy your bucket name and insert it in the placeholder ().
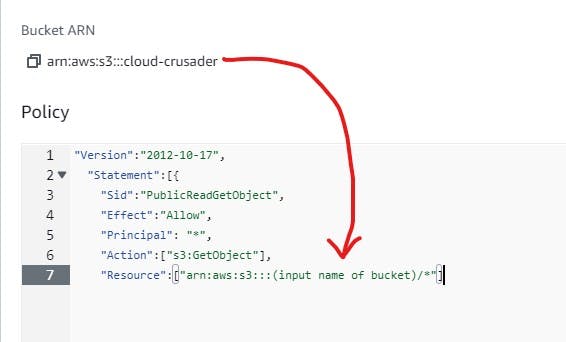
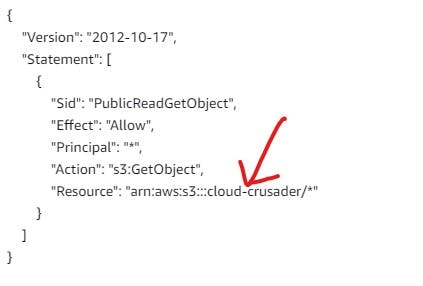
Click on "Save Changes"
Step 6. Completion Phase
Access Your Website
After saving the changes, you will receive a website endpoint URL in the Static Website Hosting section., such as http://my-awesome-website.s3-website-us-west-2.amazonaws.com.
Test the website by visiting the provided URL in a web browser to ensure its successful deployment.


Results and Outcomes

The project culminated in the successful deployment of a static website hosted on Amazon S3. The endpoint URL provided immediate access to the publicly accessible website.
Conclusion
This project served as an invaluable introduction to cloud-based web hosting using Amazon S3. The journey taught the importance of configuring buckets, enabling static website hosting, and managing permissions for public access.